

Appearance
Open Bookings
Open bookings are shared journeys where one or more members travel on a planned route. They can be public so members can discover and join them.
Booking lifecycle
The diagram below shows what happens from creating the booking through to invoicing and payment, including notifications sent along the way. Click the diagram to zoom in.

The open booking lifecycle from creation through to payment.
Create an open booking
- Go to Bookings.
- Click New booking on the list or calendar view.
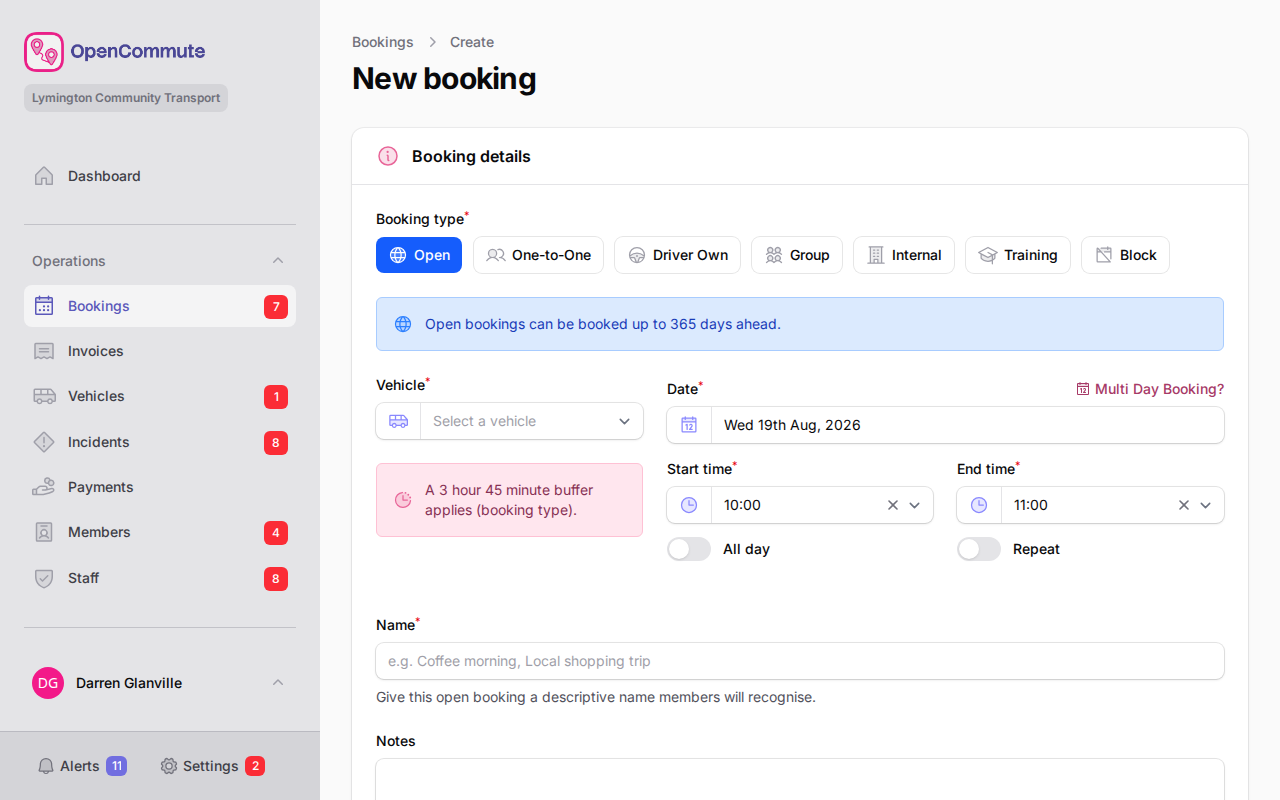
- Select Open as the booking type.
- Choose the Vehicle and set the Schedule (date plus start and end times).
- In Open details, optionally assign a Staff driver or Volunteer driver.
- Turn on Charge members if passengers should be billed for the journey.
- Turn on Public if members should be able to discover this trip (when Open bookings are public in team settings).
- Select Members who will travel — they need a paid subscription for the trip date. Capacity is shown as you add passengers. If a passenger’s subscription later lapses, the booking warns that they are not subscribed. When draft auto-cancel is on, that passenger is removed automatically in the same window as unfinished drafts — the booking itself is not cancelled. Early invoices for that passenger follow the same void-and-credit rules as a manual remove.
- Plan the route on the map and in Route stops — see Plan the route on route stops below.
- Add optional Notes, then save.
You can also create an open booking from the calendar by clicking or dragging on an empty time slot, then choosing Open before saving.
If you save without a driver, a prompt says no volunteer driver is assigned and asks whether to email eligible volunteer drivers with accept and decline links. Staff drivers are not included in this request — assign them on the form or the Drivers calendar. A table lists the volunteers who will receive the emails and when a request was already sent, so those people are not emailed again. The same question appears on every save while no driver is selected, including after Save without sending. Turn on I confirm that request emails will be sent, then choose Send request emails, or choose Save without sending. You can also send volunteer request emails from the missing-driver warning on the booking, or from the Options tab. Those use the same prompt: review the recipient table, confirm that emails will be sent, then choose Send request emails or Cancel.
Each send, skip, or “I am not available” reply is recorded on the booking Activity tab.
 An example of creating an open booking with passengers and a multi-stop route.
Plan the route on route stops
The Route stops table below the map is where you build the journey and assign members to pickup and drop-off points.
- Open the Open details tab when creating or editing an open booking.
- Set the Start address — search by address or postcode, click Click on map, or use Use home if the vehicle has a home location.
- Set the Finish address the same way.
- Add intermediate stops with Add stop, or hover the line between stops and click Add stop to insert one along the route.
- For each stop, assign members in the Picked up and Dropped off columns as needed.
- Review Est. arrival, On board counts, and the map above the table.
- Save the booking when the route and member assignments look correct.
Route stops columns
| Column | What it shows |
|---|---|
| Address | Start, numbered stops, and Finish locations |
| Est. arrival | Estimated time at each stop and distance to the next stop |
| Picked up | Members boarding at this stop |
| Dropped off | Members leaving at this stop |
| On board | How many passengers are on the vehicle after this stop (for example 2 / 4) |
Helpful actions on route stops
- Pick up all members at start — assign every booked member to the Start row in one step.
- Drop off all remaining passengers at finish — drop off anyone still on board at the Finish row.
- Add member — add a member to the booking and assign them to stops (edit page only).
- Optimise route — preview a shorter stop order, then confirm or reject the change.
- Clear blank stops — remove intermediate stops with no address set.
- Move up / Move down — change the order of intermediate stops.
Set addresses before assigning members
If no route exists yet, you cannot assign members to stops. Set Start and Finish first, then add members in the Picked up and Dropped off columns or on the Members tab.
If the total route time is longer than the booked schedule, a warning appears above the map so you can adjust the times.
Configure extra time at stops in Settings > Updating Options > Bookings tab > Open route stop times.
View the route on the map
The map above Route stops shows the planned journey as you build it.
- Review the Estimated route line connecting Start, stops, and Finish.
- Click a marker on the map to see stop details — address, estimated arrival, members picked up or dropped off, and passengers on board.
- Use the map legend to focus on Start, Finish, a numbered Stop, or the vehicle Home location.
- Use Previous stop and Next stop to step through each point on the route.
- Click Click on map on a route stop row, then click the map to set that stop’s location.
Below the map, review Estimated distance, Estimated drive time, Estimated route time, and Estimated cost as you plan the journey.
View the route on members
After the booking is saved, open the Members tab to review how each member travels on the route.
- Open the booking from the list or calendar.
- Click the Members tab — the tab badge shows how many members are booked and highlights when route assignments are incomplete.
- At the top, review the full Route timeline showing every stop on the journey.
- In the members table, use the Route column to see each member’s personal timeline from pickup to drop-off.
- Click a marker on either timeline to see stop details — address, members picked up or dropped off, estimated arrival, and passengers on board.
Members with incomplete route assignments show a warning icon in the first column. Hover the icon to see whether the member still needs a pickup, a drop-off, or both.
Invoice members from the Members tab
When Charge members is on, members are invoiced automatically before the journey (see Invoicing members). Before the invoice period starts, a notice shows the automatic invoice date. If you have permission to create invoices, you can invoice earlier from the Members tab:
- Invoice early (or Invoice all members after the automatic date) — create invoices for every member who has not been invoiced yet.
- Invoice early (or Invoice member after the automatic date) — create an invoice for one member from their row.
These actions are also available after the journey is completed for any members who were not invoiced automatically.
If you have permission to update bookings, you can use Confirm without payment on a member row to confirm their place without waiting for payment. Any outstanding invoice remains due and can still be paid later.
Finalise arrival notifications
Before the journey starts, use Finalise on the Members tab to notify every passenger of their estimated pickup time.
- Complete the route and assign every member to pickup and drop-off stops.
- Click Finalise at the top of the Members tab.
- Review the list of members who will be emailed their pickup time and address.
- For any member without an email address, tick Members informed by phone to confirm you have spoken to them.
- Click Send arrival notifications.
Every member must be either emailed or marked as informed by phone before finalise can complete. After finalise, the Arrival notice column shows Emailed, Phone informed, or Pending for each member.
Finalise before the journey starts
Finalise is available until the booking start time. After the journey begins, arrival notifications can no longer be sent from this action.
Members without email
Members do not need an email address to travel, but they cannot be emailed automatically. Use the phone confirmation checkbox for each member without an email address.
The Status column shows Payment due until the member pays or is confirmed without payment. When an invoice exists, Payment due links to that invoice. After confirmation without payment, the status shows Confirmed · Invoice due when an invoice is still outstanding. Hover that badge to see the reason given when the member was confirmed without payment.
Change a member’s route points
Use Route points on a member row when you need to change where they join or leave the route.
- On the Members tab, click Route points on the member’s row.
- Set Picked up at — choose a stop, or click Use home address to pick them up at their home.
- Set Dropped off at — choose a stop, or click Use finish to drop them at the Finish location.
- Click Save route points.
The member’s timeline and the Route stops table update together.
Add a member with route assignment
- On the Members tab, click Add member.
- Search for the member by name.
- Choose how they should join the route:
- Use their home address — adds a pickup at their home and assigns a drop-off stop.
- Select existing stops — choose Picked up at and Dropped off at from the planned route.
- Click Add member.
Route required before stop assignment
When adding a member with Select existing stops, the booking must already have Start and Finish set. If no route exists yet, plan the route on the Open details tab first.
Charge and visibility
- Charge members — when on, selected passengers are billed for the journey. Their place is not confirmed until payment is received.
- Public — when on, the trip can appear to members if Open bookings are set to public at team level in Options. Both settings must be on for members to discover an individual journey.
See Updating Options for Booking type visibility and Open booking invoicing.
Per-place pricing
When Charge members is on, the booking Estimated cost (and each member invoice) uses per-place pricing: the total is divided by the vehicle’s seat capacity.
- A 10-seat vehicle divides the total by 10 — each place costs the same amount, regardless of how many members have booked.
- The assigned Staff driver is not charged if they are also listed as a passenger.
- Each member is charged the same rounded amount to the nearest penny.
Because every member pays the same rounded share, the sum of member invoice totals can be slightly higher or lower than the booking calculated total. This is expected — the system prioritises equal member amounts over an exact penny match to the booking total.
Example: A booking calculated at £100.00 on a 10-seat vehicle:
- £100.00 ÷ 10 = £10.00 per place
- Each member is invoiced £10.00, whether 3 or 10 places are booked
Hover Estimated cost on the booking or open the invoice preview before creating invoices to see the per-place amount and total.
See Mileage and Invoicing for creating member invoices.
Minimum places
Each vehicle that allows Open bookings has a Minimum places setting (in Vehicles > vehicle details). This is the default minimum number of confirmed places needed for the journey to be viable.
When Charge members is on, only confirmed (paid) places count toward the minimum. A warning appears when confirmed places are below the effective minimum:
- On the booking edit page
- As a list indicator on the bookings list
You can override the vehicle minimum for a specific booking from the Options tab using Override minimum places. Clear the override to return to the vehicle default.
This is advisory only — the booking can still be saved and confirmed.
Invoicing members
When Charge members is on:
- Members are invoiced automatically according to the Invoice period (team default: 1 week). Configure this in Settings > Updating Options > Open booking invoicing. Choose Off to invoice members when they join.
- A member’s place is not confirmed until payment is received, unless staff use Confirm without payment on the Members tab.
- Members who join after the invoice period starts are invoiced when they are added.
- Admins with invoice permission can use Invoice early on the Members tab to invoice all members or one member before the automatic date. After the period starts, these actions are Invoice all members and Invoice member.
See Mileage and Invoicing for post-completion invoicing on the Options tab.
Remove a member
- Open the booking from the list or calendar.
- Click the Members tab.
- Click Remove member on the member’s row.
The confirmation shows a table of invoice and credit changes. Confirm with the toggle, then click Remove member. What happens depends on the Invoice period:
- During the invoice period — the invoice stays due. No refund is offered. If they did not have an invoice yet, one is created.
- Before the invoice period starts — unpaid invoices are voided. If they have already paid (in full or in part), that amount becomes account credit on the member.
Invoice period applies to the removal date
You can invoice a member earlier from the Members tab. If you later remove them before the invoice period starts, the invoice is still voided or credited.
Edit or cancel an open booking
- Open the booking from the list or calendar.
- Use Details for the vehicle, schedule, and notes.
- Use Open details for the driver, charge/public toggles, map, and route stops.
- Use Members to review member timelines and update route assignments.
- To cancel, open Options and click Cancel booking. The notice then shows who cancelled it. Other cancellation reasons are listed in Managing Bookings.
Open bookings stay editable until the scheduled start time. Once the journey begins, the booking locks and members can no longer be added or changed. After completion, end mileage can still be recorded on the Details tab.
The booking type is fixed after creation and cannot be changed on the edit page.
Related guides
- Managing Bookings — list, calendar, and filters
- Managing Members — add members who travel on open runs, and account credit
- Managing Staff — staff drivers for open bookings
- Mileage and Invoicing — record mileage and create invoices
- Booking Buffers — gaps between bookings on the same vehicle